There are poses in yoga that seem simple until you practice them with awareness. Padahastasana is one of them. At first glance, it is a forward bend, but when you slide your hands under your feet and feel the stretch go through the entire posterior chain of your body, you understand that it is much more than just bending.
Its name comes from Sanskrit: “pada” means foot, “hasta” means hand, and “asana” is posture. The literal translation is the posture of hands to feet, describing exactly the action that defines this asana.
Padahastasana is part of the classical Surya Namaskar and is one of the most complete standing forward bends in traditional yoga. In this article, you will learn how to practice it correctly, understand its profound benefits, and discover how to adapt it to your level.
Origin and Meaning of Padahastasana
In the yogic tradition, Padahastasana symbolizes the act of surrendering to the earth. By folding the body forward and placing the hands beneath the feet, the practitioner adopts a posture of humility and surrender. The head descends below the heart, reversing the usual relationship between mind and body.
This asana appears in classical texts of Hatha Yoga as an essential posture to prepare the body and mind for deeper practices. The teachers of the Bihar School of Yoga include it as a fundamental part of the bending sequences.
What separates Padahastasana from other forward bends like Paschimottanasana is that here the body’s weight acts in favor of gravity. When standing, the gravitational force deepens the stretch naturally, without the need to push with the arms.
Additionally, the gesture of sliding the hands under the soles of the feet creates a closed energy circuit. According to yoga philosophy, this direct contact between palms and soles connects the energy points of the upper and lower limbs, favoring the flow of prana.
How to do Padahastasana: step-by-step technique
Every detail in this pose matters. Follow these instructions carefully to get the most benefit and avoid injuries.
Step 1: Initial position in Tadasana. Begin standing with your feet together or hip-width apart. Distribute your weight evenly between both feet. Your arms rest at your sides. Take two or three deep breaths to center your attention.
Step 2: Inhale and lengthen the spine. As you inhale, raise your arms overhead, stretching the entire side of your torso. Feel how each vertebra slightly separates from the next one. This prior lengthening is essential to protect your lower back during the forward bend.
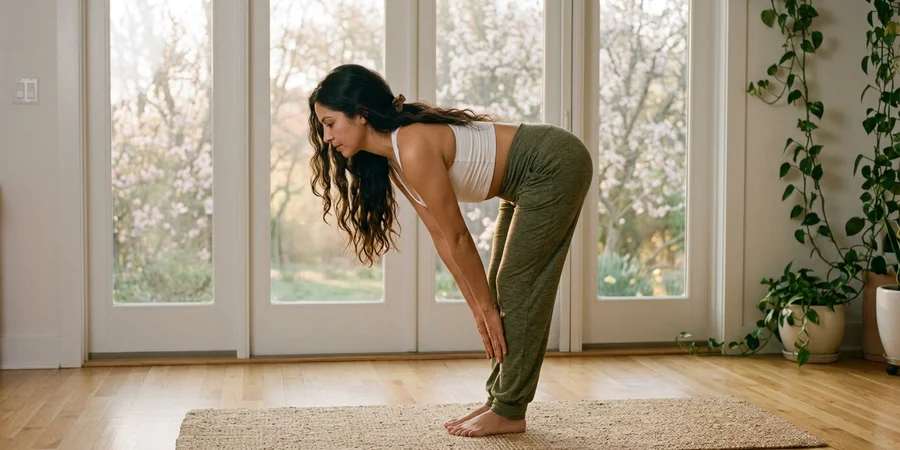
Step 3: Exhale and bend from the hips. As you exhale, initiate the bend from the hip joint, not from the waist. Imagine your pelvis tilting forward like a hinge. The torso descends with the spine lengthened, keeping the chest open for as long as possible.
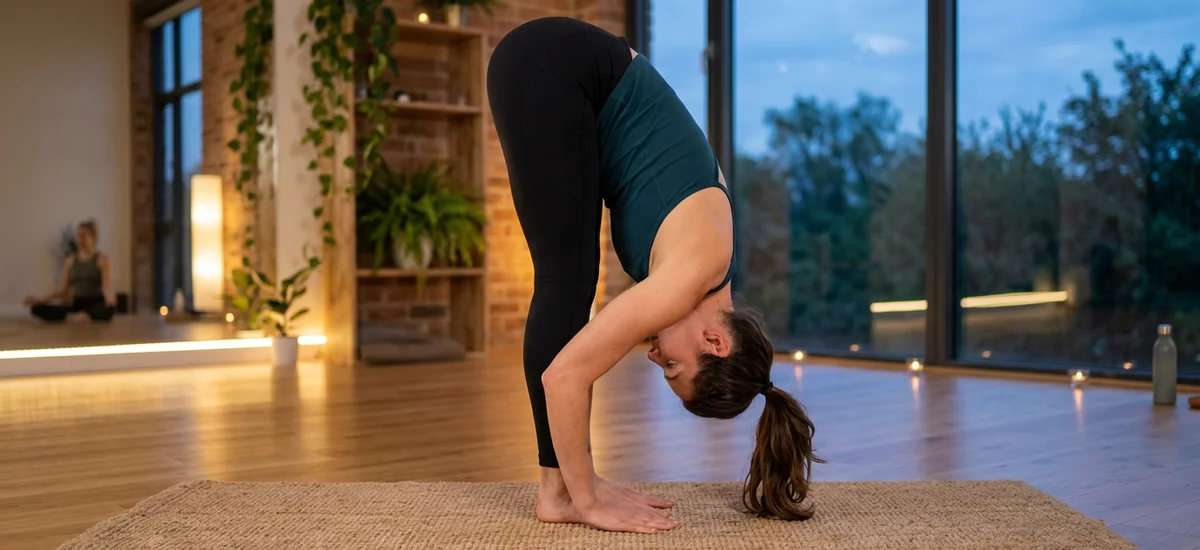
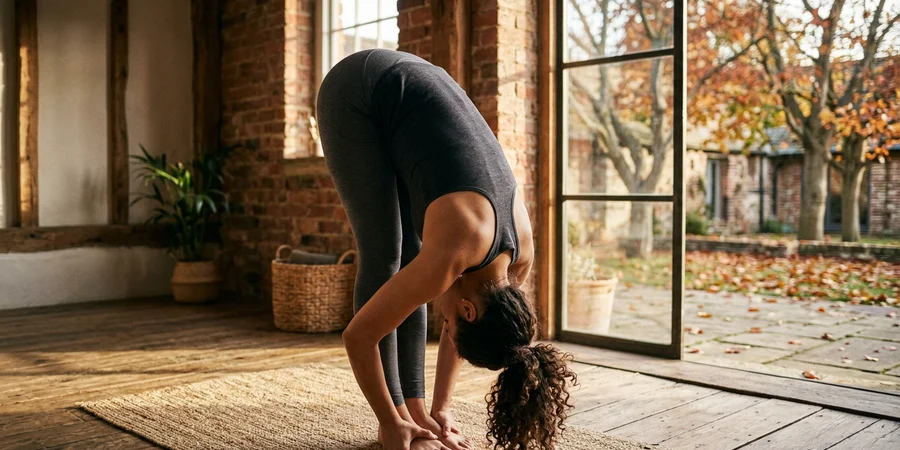
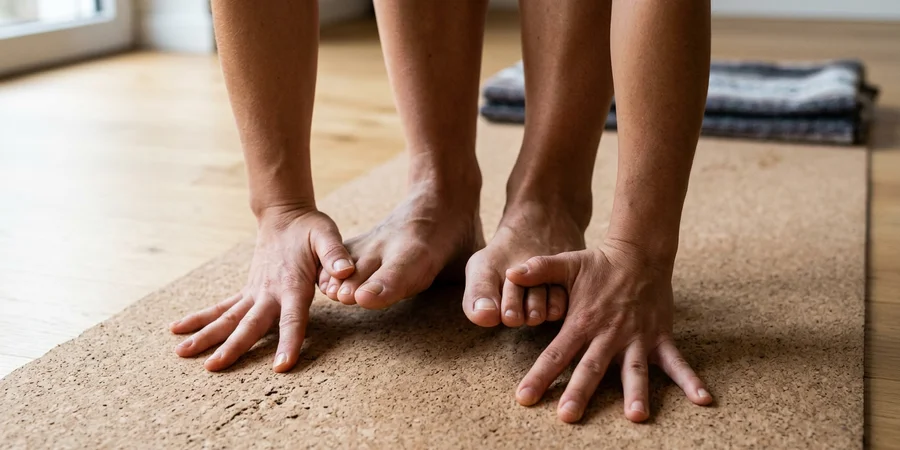
Step 4: Slide your hands under your feet. This is the signature gesture of Padahastasana. Once the torso is close to the legs, slide your hands under the soles of the feet with the palms facing up. The toes should reach the wrists or as close as possible.
Step 5: Deepen the pose. With your hands already placed, slightly bend your elbows out to the sides. Use the traction of your hands to bring your torso closer to your thighs. The crown of your head goes towards the floor. Relax your neck and shoulders completely.
Step 6: Breathing and holding. Hold the pose for 30 seconds to one minute, breathing deeply. With each inhalation, feel how your spine lengthens slightly; with each exhalation, allow your torso to move a little closer to your legs.
Common mistakes and how to correct them
Round the back from the start. Many practitioners collapse the spine when descending, creating a pronounced curve in the back. The flexion should originate from the hips, not the lumbar area. If you notice that your back rounds excessively, bend your knees to give more space to the pelvis.
Locking the knees. Hyperextending the knees creates unnecessary pressure on the joint and can cause long-term injuries. Keep a micro-bend in the knees, especially if you have hypermobility. The legs should work actively, with the quadriceps slightly contracted.
Force the hands under the feet. If your hamstrings lack sufficient flexibility, forcing your hands under your feet compromises the alignment of the entire pose. It is better to go as far as your body can naturally allow. Flexibility will come with consistent practice.
Tightening neck and shoulders. The head should hang freely, without tension. If you clench your jaw or raise your shoulders towards your ears, you are creating a contraction that prevents complete stretching. Let gravity do the work.
Hold the breath. In deep bends, it is tempting to stop breathing. However, breathing is precisely what allows going deeper. Each exhalation relaxes the muscles and creates space for the body to open.
Benefits of Padahastasana
The effects of this posture range from the muscular to the neurological, and modern research confirms what yogis have practiced for centuries.
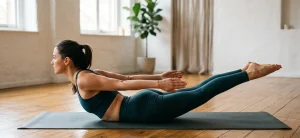
Complete stretch of the posterior chain. Padahastasana works simultaneously on the hamstrings, calves, glutes, lumbar fascia, and all the paravertebral muscles. It is one of the most efficient postures to decompress the back after hours of sitting.
Stimulation of the abdominal organs. The gentle compression of the abdomen against the thighs massages the liver, spleen, kidneys, and intestines. This improves digestion, stimulates metabolism, and aids in the elimination of toxins. Ayurvedic tradition especially recommends it for balancing digestive fire (agni).
Relief of stress and anxiety. By partially inverting the body, blood flows more easily to the brain. This increase in cerebral irrigation produces an immediate calming effect on the nervous system. Practicing it for two or three minutes can significantly reduce heart rate and overall muscle tension.
Improvement of functional flexibility. The flexibility developed in Padahastasana is not just passive. By keeping the legs active and the spine elongated, you train a flexibility that directly transfers to everyday movements: bending down, picking up objects from the floor, or tying your shoes.
Preparation for advanced postures. Mastering Padahastasana lays the foundation for deeper bends such as Uttanasana with toe grip and standing postures that require flexible hamstrings. It is an essential step in any serious progression.
Contraindications and adaptations
Padahastasana is safe for most practitioners, but some conditions require caution or modifications.
Lumbar disc injuries. If you have a herniated disc or protrusion in the lumbar area, consult your physiotherapist before practicing this pose. Deep forward bending can worsen certain disc pathologies, especially if done with a rounded back.
Uncontrolled hypertension. The inverted position of the head temporarily increases the pressure in the brain vessels. If you suffer from untreated hypertension, avoid holding the posture for long periods or practice with your knees bent and torso at a half-height.
Active sciatica. When the sciatic nerve is inflamed, intense stretching of the hamstrings can worsen symptoms. Generously bend your knees and do not go deeper than where you feel a gentle and tolerable stretch.
Adaptation with bent knees. If your hamstrings are very tight, practice Padahastasana with your knees slightly bent. This allows your hands to reach under your feet while protecting your lower back. Over time, you will be able to gradually stretch your legs.
Adaptation with blocks. If your hands do not reach the floor, place two yoga blocks next to your feet. Support your palms on the blocks and work the bend from there. This variation retains all the benefits without compromising alignment.
Variants to explore
Once you master the classic version, these variations expand the benefits and add new dimensions to your practice.
Padahastasana with active traction. In the full posture, gently press the soles of your feet against your palms while lightly pulling your feet with your fingers. This reciprocal action intensifies the stretch of the hamstrings and activates the wrist flexors.
Dynamic Padahastasana. Instead of holding static, gently sway with each breath. Inhale as you lengthen the spine and lift the torso a few inches; exhale as you deepen the bend. This rhythmic movement warms the tissues and allows you to go deeper safely.
One-legged Padahastasana. From the complete pose, shift the weight to one foot and lift the other leg back to form a T with the body. The hands remain under the supporting foot. This advanced variation greatly challenges balance and core strength.
Padahastasana in Surya Namaskar and daily practice
In traditional Surya Namaskar, Padahastasana occupies the third position in the sequence. After Tadasana and the back extension, the body folds forward into this deep bend.
In this context, the pose acts as a reset for the nervous system. After the opening and activation of the extension, the flexion calms, gathers, and centers the energy before continuing with the sequence.
Outside of Surya Namaskar, Padahastasana is excellent as a morning pose. Two minutes upon waking decompress the spine, activate circulation, and prepare the body for the day. It is especially helpful if you work sitting for many hours.
The pose also serves as a natural transition to other folds. From Padahastasana, you can easily move into Adho Mukha Svanasana by stepping back with your feet, or descend into a deep squat by separating your knees.
The key is not to touch the floor with your palms on the first day. It is to practice with patience and breath, letting your body open at its own pace. Yoga teachers in India repeat something worth remembering: flexibility is not a requirement of yoga, it is a consequence.
If you are exploring the fundamental yoga postures, Padahastasana deserves a central place in your practice. It is a pose that reveals exactly where your body is today, and, with consistency, shows you how far it can go.