Among all the extensions of yoga, there is one that captures attention and admiration: the body turned into a perfect arch, supported on hands and feet, with the back forming a wheel that defies gravity. Chakrasana is, probably, the most iconic posture of the backbend universe.
The wheel posture is aspirational for many practitioners. Not because it is impossible, but because it demands an integration that few asanas ask for in a single form: strength in the arms, mobility in the shoulders, thoracic opening, core activation, and a good dose of confidence. All together.
In this article, we will see what its name means, what the correct progression is from the bridge to the full wheel, what the most dangerous mistakes are, and how to prepare the body safely to explore it.
Meaning and dual name of the posture
The word Chakrasana comes from the Sanskrit chakra (चक्र), “wheel”, and asana (आसन), “posture”. The translation is direct: “wheel posture”.
But this same asana has a second equally common name: Urdhva Dhanurasana, where urdhva (ऊर्ध्व) means “upward” and dhanura (धनुर), “bow”. The translation would be “upward-facing bow posture” or “upward bow”. Both names are valid and describe the shape of the body from different angles.
“Wheel” emphasizes the symmetrical and circular curvature that the body forms when viewed from the side. “Upward bow” highlights the difference from Dhanurasana (the classic bow, belly down), where the opening points to the ground; in Chakrasana, the arch points to the sky.
The connection with the chakras
The name is not just descriptive. In the Tantric tradition, the human body houses seven chakras, energy centers distributed along the spine. Chakrasana, by fully opening the anterior side of the body and extending the entire spine, simultaneously stimulates several of these centers.
The pelvis activates Muladhara (root) and Svadhisthana (sacral). The extended abdomen awakens Manipura (solar plexus). The open chest releases Anahata (heart). Tradition considers it one of the most energizing postures in the classic repertoire.
Necessary preparation before Chakrasana
Chakrasana is not a posture for improvisation. Going in cold is the most frequent cause of wrist, shoulder, and lower back injuries in yoga. Preparation is, literally, half of the practice.
Before holding the full wheel, the body needs specific mobility in three areas and strength in two more. Without this foundation, forcing the posture is just a matter of time until discomfort occurs.
Wrists, shoulders, and spine
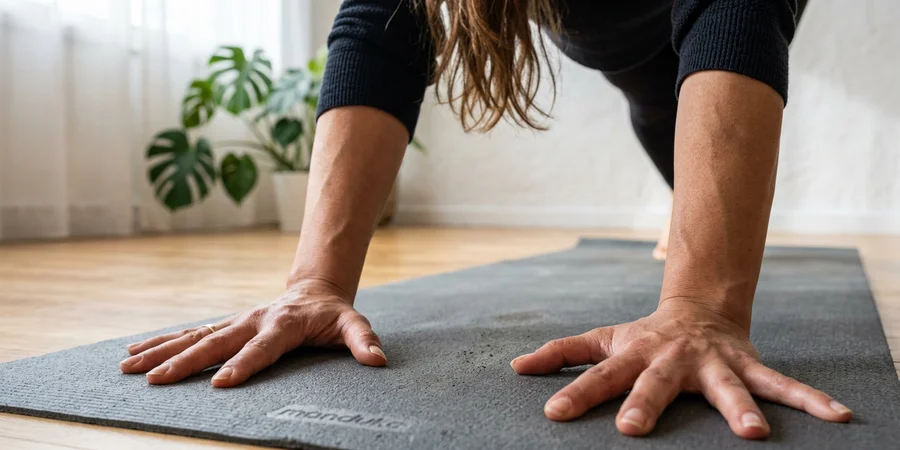
The wrists bear a significant portion of the body weight in hyperextension. They need specific warming up: circles, passive flexions against the floor, opening in quadruped position with fingers toward the knees. Three minutes of prior joint mobility prevents most injuries.
The shoulders require full flexion (arms above the head without arching the lower back). If you do not have that flexion available, the strength to push the floor comes from the lower back. This is the main cause of lower back pain in Chakrasana: it is not the posture, it is the lack of mobility in the shoulders.
The spine needs progressive warm-up in extension. Cat-cow, sphinx, cobra, and Ustrasana are the natural sequence of preparation. Arriving at Chakrasana without having gone through that progression is skipping several steps.
Leg and core strength
The legs are what support the elevation of the pelvis during the posture. Active quadriceps and glutes are essential. The supported bridge (Setu Bandhasana) for several breaths prepares this activation and reveals if the legs are ready.
The core, contrary to what many think, does not relax in Chakrasana: it activates. The transverse abdominis protects the lower back from excessive compression. Without an active core, the entire curvature falls on the lower vertebrae and discomfort appears.
Progression: from the bridge to the full wheel
Learning Chakrasana is not a matter of trying it many times. It is a matter of following a three-stage progression that the body can integrate safely.
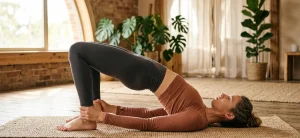
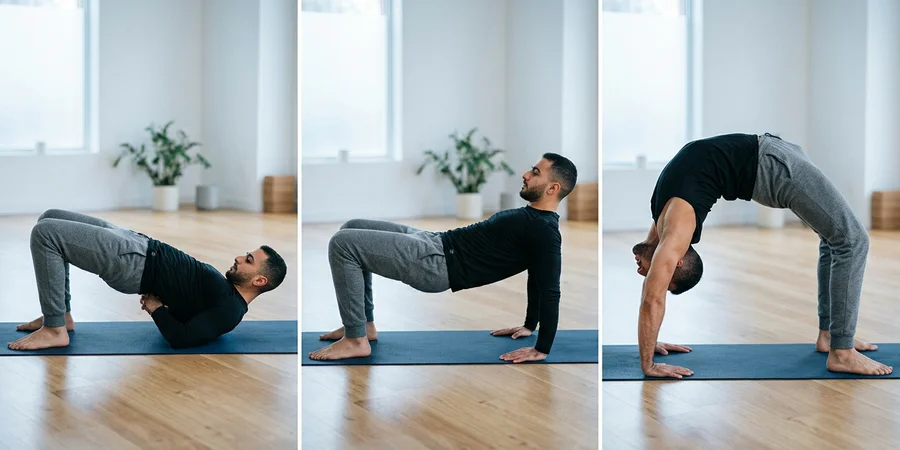
Stage 1: Setu Bandhasana (the bridge)
Lying on your back, with feet placed near the glutes, raise the pelvis by pressing the feet against the floor. Arms stay at the sides of the body with palms down. Hold the posture for 5 to 10 breaths.
This stage teaches the activation of legs and glutes, the opening of the chest, and the neutrality of the pelvis. Mastering it comfortably is the minimum requirement to consider Chakrasana. If the bridge still generates tension, there is no hurry to move forward.
Stage 2: Half bridge with hands on the lower back
From the bridge, bend the elbows and place the hands on the lower back area, with fingers pointing toward the pelvis. Push with the elbows toward the floor and raise the pelvis a bit more. This variant prepares the arm position without demanding the strength of the full wheel.
Here you begin to familiarize yourself with the sensation of having the weight on the shoulders and elbows. If pain appears in the lower back or wrists, reduce the height. If everything flows, hold the posture for several breaths before progressing.
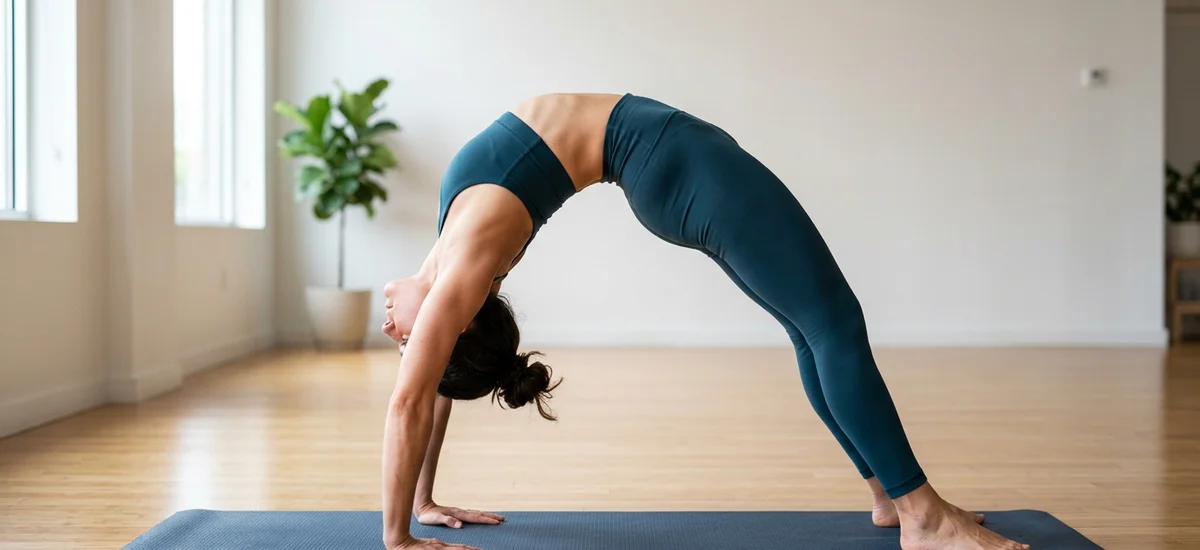
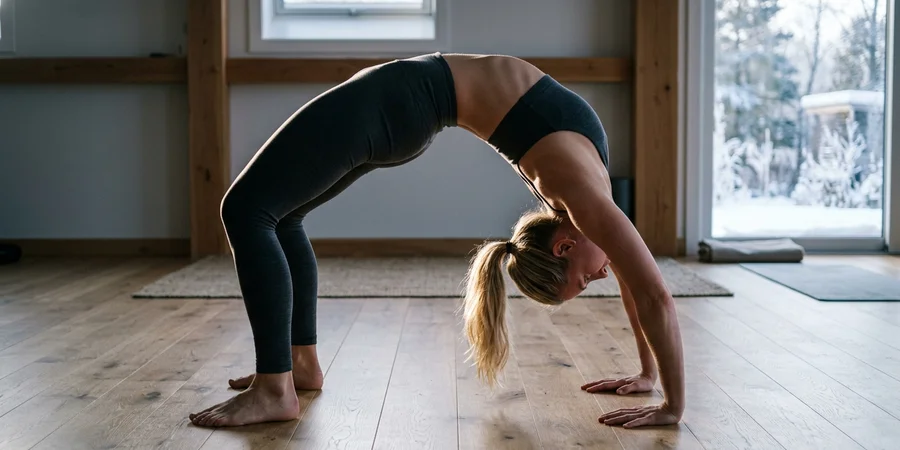
Stage 3: Full Chakrasana
From the previous position, place the palms at the sides of the head with fingers pointing toward the shoulders. Press the palms and feet firmly against the floor, raise the crown of the head, and, with an inhalation, extend the arms pushing the entire body upward.
The head remains relaxed between the arms, the pelvis continues to rise, and the thighs remain active. Hold for 3 to 8 breaths the first time. To come out, bend the elbows, rest the crown of the head, then the shoulders, and finally return to the floor vertebra by vertebra.
How to do Chakrasana step by step
This is the detailed description for those who have already completed the progression and are ready for the full version.
- Lie on your back. Bend your knees and place your feet close to your glutes, hip-width apart. Feet parallel, with toes pointing forward.
- Place your hands near your head. Bring your palms to the floor at the sides of your head, with fingers pointing toward your shoulders. Elbows point to the ceiling and remain parallel, never splayed outward.
- Press and lift the crown of the head. As you inhale, firmly press your feet and palms against the floor and lift your pelvis and head until the crown of your head is supported. This is an intermediate position, not the final one. Adjust the hand position if necessary.
- Push upward. With another inhalation, extend your arms and legs simultaneously. The head moves away from the floor and remains relaxed between the arms, looking backward.
- Align elbows and knees. Elbows should remain parallel, not splay outward. Knees also parallel, aligned with the feet. If they splay, the posture loses efficiency and the lower back is compressed.
- Distribute weight evenly. Approximately half the weight on the hands and the other half on the feet. Push both ends against the floor. This distribution activates arms and legs equally and offloads the spine.
- Activate glutes and abdomen. Slightly contract the glutes to project the pelvis upward and activate the transverse abdominis to protect the lower back. These activations, invisible from the outside, are what distinguish a nourishing posture from a harmful one.
- Breathe and hold. Hold for 3 to 10 breaths, according to your level. The breath must continue to flow freely; if you hold your breath, the posture is asking you to come out sooner than you think.
- Exit with control. Slowly bend the elbows, rest the crown of the head, then the shoulders, and return to the floor with the entire spine. Rest with knees to the chest for a few breaths before getting up.
Common mistakes and how to correct them
Chakrasana is generous to those who respect it and harsh to those who force it. Knowing the most frequent mistakes is the best protection against typical injuries in this posture.
Elbows splayed outward
The most visible and frequent error. When the elbows separate to the sides, the shoulder joint loses congruency and the weight falls on the ligaments and joint capsule. Discomfort appears in the rotator cuff or the front part of the shoulder.
The correction starts before pushing upward: when placing the hands, make sure the forearms are parallel and directed toward the ceiling. During the posture, imagine you are holding a block between your elbows. If the elbows splay, it means the shoulders do not have the mobility the posture requires. Return to the progression.
Compression in the lower back
If you feel a pinch or pressure in the lower back, the posture is not well-organized. It is usually due to a combination of lack of thoracic mobility, lack of shoulder flexion, and lack of glute and abdominal activation.
The solution is not to seek height at any price. Prefer a lower wheel with the curvature distributed throughout the entire spine to a high wheel with the entire arch concentrated in the lower back. Activate the glutes, project the pubis toward the ceiling, and remember that thoracic extension is where the greatest opening should occur.
Tense neck
Another frequent error: trying to hold the head up instead of letting it drop between the arms. The neck must be relaxed, following the natural curvature of the extended spine. If you tense it, cervical tension and subsequent headaches appear.
To avoid this, firmly push the shoulders upward (away from the floor) and let the head hang effortlessly. The gaze, if you have cervical mobility, goes backward; if not, to the floor between the hands.
Benefits of Chakrasana
Few postures activate so much of the body at once. Chakrasana is practically a full-body exercise with components of strength, flexibility, and coordination.
Physical benefits
The posture integrally strengthens the posterior and anterior chains at the same time. Glutes, hamstrings, spinal erectors, triceps, deltoids, and transverse abdominis work in synchrony. It is one of the best functional strength exercises in traditional yoga.
At the spinal level, it fully extends the 33 vertebrae and mobilizes the thoracic spine, the stiffest area in most adults. If the posture is done with alignment, the thoracic spine gains mobility with every month of regular practice.
The pectorals, hip flexors, quadriceps, and anterior fascia receive a deep stretch. These muscle groups shorten with sedentary lifestyles, and Chakrasana releases them in a way few asanas can match. After a few minutes of practice, walking posture changes notably.
At a physiological level, the partial inversion of the trunk stimulates the endocrine system, especially the thyroid, parathyroid, and pituitary glands. This is why classic texts link it to a sensation of sustained invigorating energy.
Energetic and mental benefits
Chakrasana is considered a highly energizing posture. After holding it, it is common to experience an increase in levels of attention, mental clarity, and vitality. It is no coincidence: the combination of deep extension, cardiovascular stimulation, and hormonal activation produces an immediate effect.
On an emotional level, it is a posture that confronts fear. Exposing the chest, throat, and pelvis upward is, symbolically, a form of chosen vulnerability. Many practitioners experience anxiety the first few times they try it. Overcoming that resistance is part of the learning process.
It is no coincidence that in traditional sequences, Chakrasana is practiced after gentle opening postures and before final relaxation. Its energetic effect is so intense that it needs time to be integrated before closing the practice.
Variations and modifications
Chakrasana allows for variations that expand its range and others that make it accessible in early stages of learning.
Accessibility for beginners
Bridge with a block under the sacrum. Lying in Setu Bandhasana, place a block at its lowest height under the sacrum. The posture is held passively, allowing you to work on opening without intense muscular effort. It is one of the most effective and relaxing preparations to open the anterior hip.
Chakrasana with blocks under the hands. Place two blocks at an angle, against a wall, and rest your hands on them. Raising the hands reduces the demand for mobility in the shoulders and wrists, making the posture much more accessible without losing its essence.
Chair support. Lying with a chair over the abdomen, rest your hands on the edge of the chair and push to lift the body. This version, typical of the Iyengar tradition, allows for staying in the posture for several minutes with full support.
Advanced progressions
Eka Pada Chakrasana (one-legged wheel). From full Chakrasana, raise one leg toward the ceiling while maintaining the extension. It requires additional strength in the supporting leg and stability in the shoulders. Practice after consolidating the sustained wheel for several breaths.
Dropbacks. From Tadasana, slowly fall backward until landing in Chakrasana. This is the classic progression in Ashtanga and requires months or years of preparation. It is never practiced without experienced supervision and a very solid foundation in the static posture.
Kapotasana from Chakrasana. Once in the wheel, walk the hands toward the ankles until forming an inverted Kapotasana. This is one of the most advanced expressions of this family of postures and is reserved for long-term practitioners.
Counterposture and closing after Chakrasana
Like all deep extensions, Chakrasana demands a counterposture that compensates for the intense arch. Skipping this phase is the fastest way to accumulate lower back tension.
The classic counterposture is hugging the knees to the chest (Apanasana) for at least 10 breaths. Afterward, a gentle forward fold like Paschimottanasana with a long spine finishes balancing the column.
Never go directly from Chakrasana to an inversion, to Savasana, or to another active posture. The minutes following are an integral part of the practice: they give the body the time it needs to assimilate the opening without residual tension.
Contraindications
Chakrasana has clear contraindications that must be respected. Forcing this posture with a contrary medical condition is the fast track to a serious injury.
If you have lower back injuries (herniated disc, spondylolisthesis, stenosis), avoid the full version. Practice only the bridge with a neutral spine and, if you want opening, work with passive supports instead of active extensions.
With wrist injuries (carpal tunnel syndrome, tendonitis, sprains), substitute with the chair or block version. If pain persists, omit the posture until resolution.
In case of shoulder injuries or very reduced mobility in flexion, do not force the posture. The absence of shoulder flexion will transfer the entire load to the lower back. Work on specific mobility first for several weeks before attempting the wheel.
With uncontrolled high blood pressure, glaucoma, recent retinal detachment, or serious cardiovascular problems, avoid inversions and deep extensions. Consult with a medical professional before incorporating the posture.
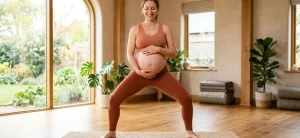
During pregnancy, the posture is contraindicated from the first trimester onward. After childbirth, wait at least three months and reintroduce with progression from the bridge.
The wheel that integrates strength, mobility, and confidence
What makes Chakrasana special is not its technical difficulty, but the way it asks the entire body to collaborate at the same time. Having flexible shoulders is not enough, nor is having strong arms, nor having a mobile spine: it requires these three qualities to join hands in a single gesture.
This integration is what makes it a transformative posture. When it finally comes out full and sustained, the body remembers it long after having exited. And the next time is easier. Not because one is more flexible, but because one has learned to organize the effort with more intelligence.
That is why it is a posture worth pursuing with patience. Not for a reel, not for a photo, but for what it teaches about oneself: the ability to sustain the difficult with long breaths, to trust in one’s own structure, and to let go of the fear of exposure.
If you want to learn to teach extensions with criteria and build safe progressions for different levels, our 200h Yoga Teacher Course includes modules dedicated to the biomechanical analysis of extensions and pedagogy applied to the study of advanced yoga postures.