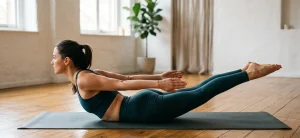
Some yoga postures contain a paradox: they appear asymmetrical on the outside but create a deep balance on the inside. Janu Sirsasana is exactly that. With one leg extended and the other tucked in, the torso folds forward in a bend that stretches, calms, and reveals the differences between both sides of the body.
Its regular practice is part of the primary series of Ashtanga Vinyasa and appears in numerous Hatha Yoga sequences. However, you don’t need to be an advanced practitioner to benefit from it. With the right adaptations, anyone can explore this asana from the very first day.
In this article, you will find the detailed technique of Janu Sirsasana, its benefits supported by tradition and science, the most common mistakes, and the variations that will allow you to deepen at your own pace.

Meaning and Origin of Janu Sirsasana
The name of this pose comes from three terms in Sanskrit. “Janu” means knee, “sirsa” means head, and “asana” is pose. The literal translation is the pose where the head moves towards the knee, describing the final gesture of the bend.
In the classical texts of yoga, Janu Sirsasana is mentioned as an asana that balances the body’s energy by working each side independently. Unlike Paschimottanasana, where both legs participate equally, here the asymmetry is intentional. It forces the practitioner to observe which side is more tense, where there is greater resistance, and how each hip responds.
Pattabhi Jois included it in the primary series of Ashtanga Vinyasa as one of the fundamental seated forward bends. It is practiced in three variations (A, B, and C) that progressively open the hips and spine. The version we describe here is Janu Sirsasana A, the most accessible and the basis for the others.
For the philosophy of yoga, folding forward symbolizes introspection. When you bring your forehead to your knee, you direct the senses inward and favor a state of introspection that prepares the mind for meditation.
How to do Janu Sirsasana step by step
Correct alignment in this posture makes the difference between a superficial stretch and a truly transformative practice. Follow each step with attention and without haste.
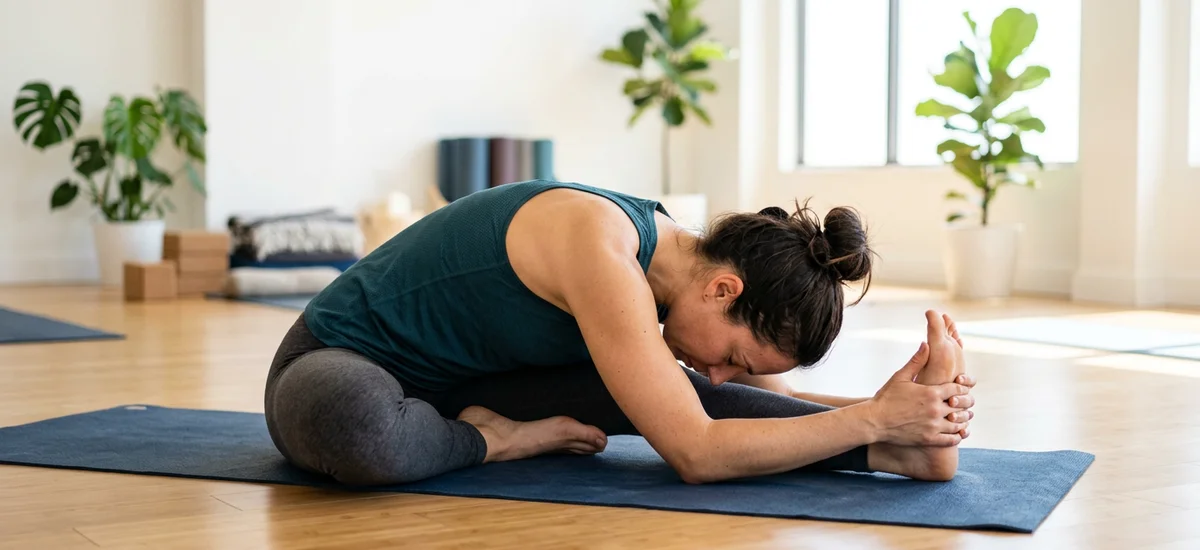
Step 1: Sit with both legs extended. Begin in Dandasana, sitting on the floor with your legs straight in front and your spine erect. Your hands rest beside your hips, fingers pointing towards your feet. Lightly engage your quadriceps and flex your feet towards you.
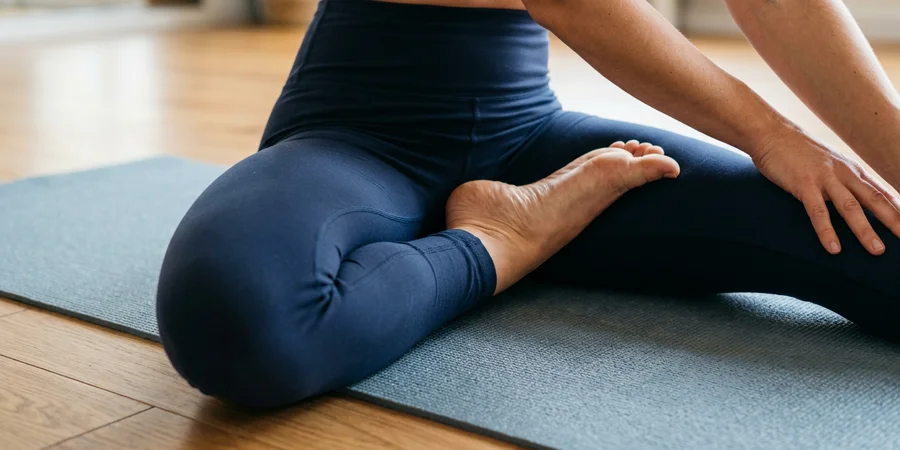
Step 2: Bend the right leg. Flex the right knee and bring the sole of the right foot towards the inner thigh of the left leg. The right knee gently descends towards the ground, without forcing. The angle between both legs should be comfortable, approximately 90 degrees or slightly more open.
Step 3: Orient the torso towards the extended leg. Gently rotate your navel and chest to align them with the left leg. This subtle adjustment is essential: if the torso is oriented towards the center, the bend will compress the ribs and limit breathing.
Step 4: Inhale and lengthen the spine. As you inhale, raise your arms and feel how the spine stretches from the coccyx to the crown. Create space between the vertebrae. This prior lengthening protects the lower back and allows for a deeper and safer bend.
Step 5: Exhale and bend from the hips. As you exhale, incline the torso forward while maintaining the length of the spine. The bend originates in the hip joint, not in the waist. Imagine that you want to rest your abdomen on your thigh, not your forehead on your knee. The hands reach for the left foot, ankle, or shin, depending on your flexibility.
Step 6: Hold and breathe. Stay for 5 to 10 deep breaths. With each inhalation, elongate the spine a little more. With each exhalation, relax the shoulders and allow the torso to move closer to the leg. Then repeat the entire process with the opposite side, extending the right leg and bringing the left in.
Common mistakes and how to fix them
Rounding the back to reach further. It is the most common mistake. Many practitioners sacrifice spinal alignment to touch their toes with their hands. An excessively rounded back compresses the intervertebral discs and reduces the stretch in the hamstrings. It is preferable to keep the spine long and only reach to the shin.
Forcing the bent knee toward the ground. Hip opening takes time. Pressing the knee down with the hand or insisting with bounces can damage the internal ligaments of the knee. Let gravity and muscle relaxation do the work. If the knee remains elevated, place a block or a rolled blanket underneath to support it.
Not aligning the torso with the extended leg. If the chest is pointing forward instead of toward the extended foot, the flexion loses its natural axis. This misalignment creates lateral tension in the lower back and reduces the depth of the stretch. Make sure to rotate your navel toward the leg you are stretching.
Locking the knee of the extended leg. Hyperextending the knee creates dangerous pressure at the back of the joint. Maintain a subtle micro-bend that keeps the muscles active without compromising the joint structure.
Forget about breathing. In deep folds, the natural tendency is to hold the breath. However, conscious breathing is precisely the mechanism that allows you to release muscle tension and deepen the pose. Each long, controlled exhalation relaxes the muscle fibers and opens up new centimeters of movement.
Benefits of Janu Sirsasana
This pose offers a range of therapeutic effects that make it one of the most valuable seated forward bends in yoga. Its benefits encompass the muscular, visceral, and neurological aspects.
Deep stretch of hamstrings and back. The extended leg undergoes an intense stretch along the entire posterior chain: from the heel, through the calves and hamstrings, to the lumbar and dorsal muscles. The asymmetry of the pose allows for more precise work on each side of the body, detecting and correcting imbalances.
Progressive hip opening. The bent leg gently and steadily works on the external rotation of the hip. With regular practice, the joint gains range of motion without the stress that more aggressive opening postures generate. This makes it an excellent preparation for advanced asanas like Padmasana.
Stimulation of the abdominal organs. By folding the torso over the thigh, a gentle compression of the abdomen occurs, massaging the internal organs. This effect improves digestion, stimulates liver and kidney function, and enhances intestinal transit. Ayurvedic tradition particularly recommends it to balance the fire element.
Calm of the nervous system. Forward bends activate the parasympathetic nervous system, responsible for the rest and recovery response. Studies in exercise physiology have documented that maintaining bent postures for several minutes reduces heart rate and cortisol levels. Janu Sirsasana, due to its introspective nature, enhances this effect.
Relief from lower back stiffness. For those who spend long hours sitting, this pose decompresses the lower back area and stretches the thoracolumbar fascia. It is an ideal complement to counteract the effects of a sedentary lifestyle, something that research on benefits of yoga has often highlighted.
Improvement of concentration. The asymmetry of Janu Sirsasana requires constant attention to alignment, breathing, and sensations on each side. This demand for mental presence makes it a meditative practice in itself, training the ability to focus which is then transferred to other areas of life.
Contraindications and adaptations
Janu Sirsasana is a safe posture for most people, but certain conditions require modifications or professional supervision.
Knee Injuries. If you have a meniscal, ligamentous injury, or recent knee surgery, bending the raised leg may aggravate the problem. Consult your physiotherapist before including it. Alternatively, you can place the sole of your foot against the calf instead of the inner thigh, reducing the angle of flexion.
Lumbar Disc Herniations. Deep forward bending may worsen certain disc pathologies. If you have a diagnosed hernia or protrusion, practice the gentler version: an elongated spine with minimal bending, without seeking depth. Always prioritize the length of the spine over the range of flexion.
Pregnancy. Starting from the second trimester, the abdominal compression generated by bending may become uncomfortable or inappropriate. Pregnant women can practice an open version, slightly separating the torso from the leg and using a strap around the foot to maintain distance.
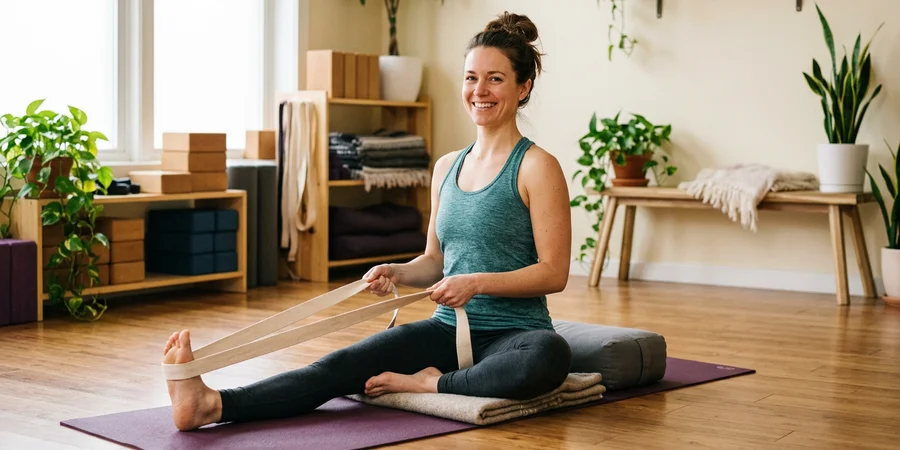
Adaptation with strap or towel. If your hands can’t reach the foot of the extended leg, wrap a yoga strap or a towel around the sole of the foot and hold both ends with your hands. This allows you to keep your spine long while gradually working on flexibility. It is the most recommended adaptation for beginners.
Adaptation with blanket under the hip. If you notice that the pelvis tilts back when you sit, elevate it with a folded blanket or a firm cushion. This small lift changes the angle of the hip and greatly facilitates forward bending, making the pose accessible even with very tight hamstrings.
Variations of Janu Sirsasana
Janu Sirsasana B. In this variant, the practitioner sits on the heel of the bent leg, with the toes pointing forward and the heel pressing against the perineum. The bend is performed similarly to version A, but the position of the foot adds stimulation at the base of the pelvis and a greater hip opening. It is significantly more intense than the classic version.
Janu Sirsasana C. Here, the toes of the bent leg point toward the ground, with the heel facing upwards. This internal rotation of the foot and tibia works the ankle and knee joints at an unusual angle, developing joint mobility in planes that conventional postures often do not address. It requires consistent practice and patience.
Parivrtta Janu Sirsasana (twist). Instead of folding the torso towards the extended leg, the practitioner tilts the side of the body over it while opening the chest towards the ceiling. One hand grips the foot and the opposite arm extends over the head, creating a deep lateral stretch. This variation combines flexion, hip opening, and side stretching in a single gesture, and is especially useful for releasing tension in the intercostals and the lumbar square.
Janu Sirsasana in your daily practice
Due to its calming nature, Janu Sirsasana naturally fits in the second half of a yoga session, when the body is already warmed up and the mind has begun to settle. In the Hatha Yoga tradition, seated forward bends are practiced after standing postures and spine extensions, creating an arc that goes from activation to introspection.
If you have limited time, three to five minutes per side is sufficient to achieve a real therapeutic effect. Practice after a workday to decompress your back, or include it in your nightly routine as preparation for rest. Its effect on the parasympathetic nervous system makes it a natural ally for restorative sleep.
The asymmetry of the posture has a pedagogical value that is often overlooked. By comparing both sides, you learn to listen to your body with an attention that symmetrical postures do not require. Does the right side resist more? Does the left hip open up more easily? These observations are part of the self-knowledge that yoga cultivates session after session.
If you are exploring the classic yoga postures, Janu Sirsasana deserves a regular place in your sequence. It is not the most visually striking or spectacular posture, but it carries a teaching that masters in India have been passing down for centuries: true depth is measured not in centimeters, but in presence.
Each time you fold forward and find a little less resistance, you not only gain flexibility. You gain patience, self-observation, and the certainty that the body responds when given the time it needs.